To change a black and white drawing to a colour image on transparent background
without vectorising the image
1. Open in Photoshop
2. Unlock the background layer (make it Layer 0)
3. Double click the layer to open the Layer Style dialogue box
4. Option+click (or alt+click) and drag the white triangle on the ‘this layer’ slider to split it
This hides the white in your layer. Splitting it feathers/softens the edges.

5. Make sure your are in RBG or CMYK colour mode (not grayscale). Then add a Hue/Saturation adjustment layer
6. Double click the adjustment layer, check ‘colorize’, increase the saturation and brightness/lightness. Don’t bother about the hue
7. Add another layer and fill it with the colour you want your drawing to be. Hide the layer
8. Press CMD+OPT+SHIFT+E to make a layer that’s a duplicate of all visible layers
9. Select that layer (which is your drawing in colour on a transparent background
10. Go to image>adjustments>match colour
11. Select your document and the layer with the target colour from the dropdown menus
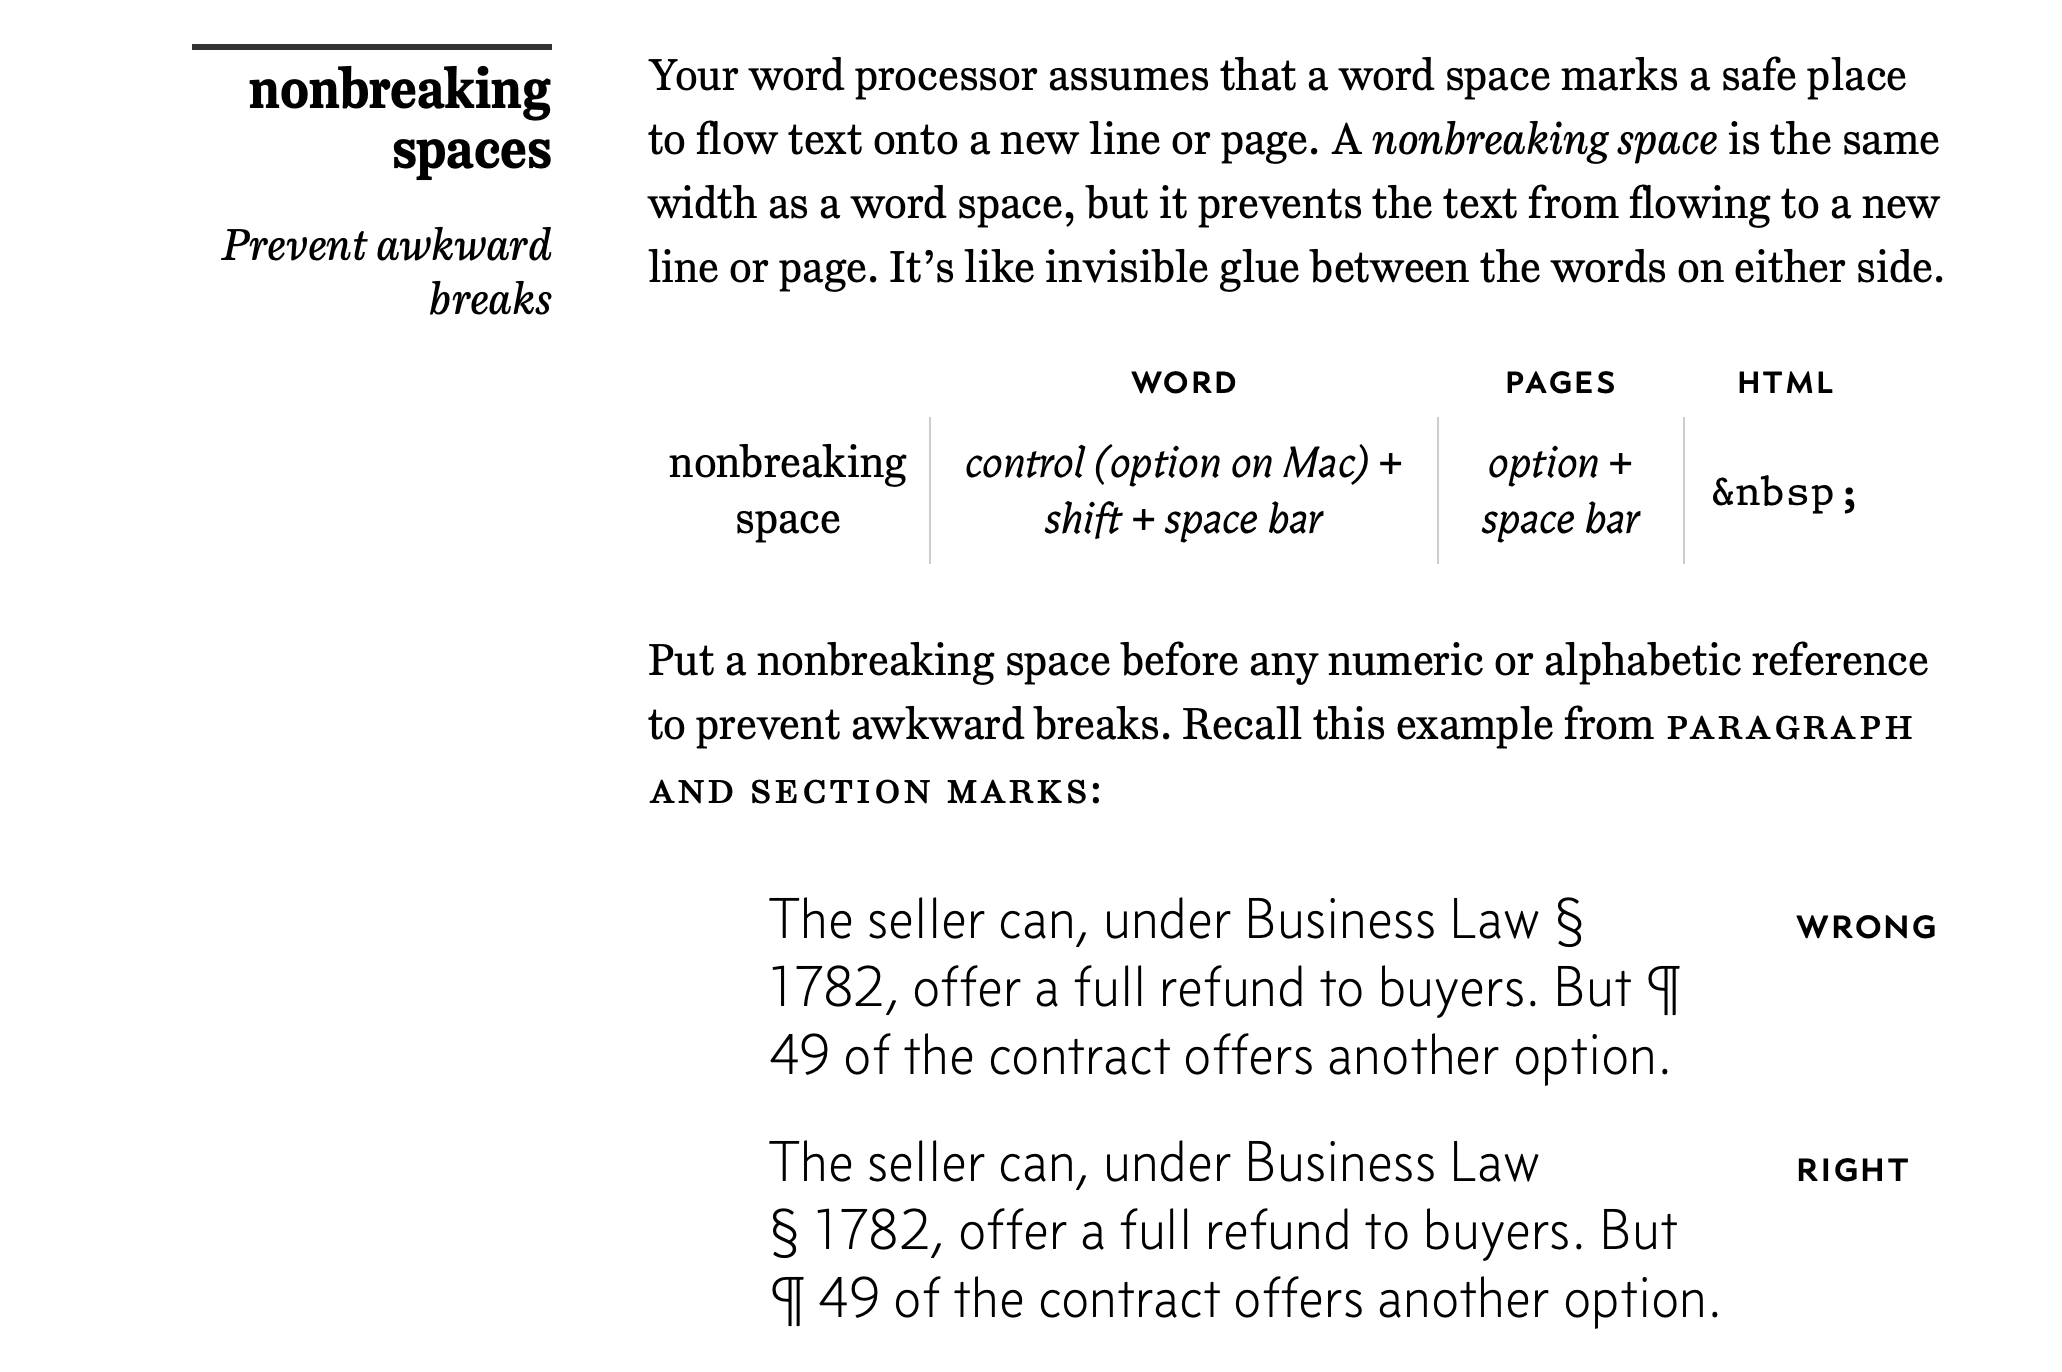
To avoid awkward line breaks in names, dates, etc. put a non-breaking space instead of a normal space. Then the words will never be broken onto two lines. For example, if you’re doing a layout and there’s a name in a paragraph, it’s awkward and irritating to have the name split over two lines, and it can be a pain to always have to check to see if its happened.
When inserting the text, change the space between the words you want to keep together to a “non-breaking space”
1. In InDesign: type CMD+OPTION+X or go Type>Insert White Space> Non-breaking space
2. In other programs (Word, etc.) and in HTML the shortcuts and codes are different. See table below:
To add fonts to Cargo:
- Add the font files to the file upload section in Cargo. Add woff, woff2 and otf and ttf if possible, just to be safe as some browsers don’t support certain formats
- Add this code to “Custom CSS”
- Customise the name (here it’s “Sabon Italic”) and URL for the font files as needed (click on the uploaded font file and copy the URL from there)
- Keep font style and weight as specified below (regular and 400). Add a new @font-face record for each weight of the font
@font-face {
font-family:“Sabon Italic”;
src:url(“https://files.cargocollective.com/c639870/sabon-italic.woff2”) format(“woff2”),
url(“https://files.cargocollective.com/c639870/sabon-italic.woff”) format(“woff”),
url(“https://files.cargocollective.com/c639870/sabon-italic.otf”) format(“opentype”);
font-style:normal;
font-weight:400;
}
5. Once you have added the code to the Custom CSS panel, go to the typography panel. When clicking on each heading (Bodycopy, H1, H2, Small) you will notice an Edit CSS button in the bottom right corner. Click that button an add the name of the newly uploaded typeface into the code where it reads ‘font-family’. Remeber to also change the font style accoring to your preference.
[data-predefined-style=”true] h1 {
font-family: "Sabon Italic", Icons;
font-style: italic;
font-weight: 400;
padding: 0;
margin: 0;
font-size: 5.5rem;
line-height: 1;
color: rgba(0, 0, 0, 1);
}
For more info and syntax, look at these:
https://www.w3schools.com/cssref/css3_pr_font-face_rule.asp
https://support.cargo.site/Using-Your-Own-Webfonts